How to Start a Profitable Blog in 2024
A Detailed Guide – by Stanley Udegbunam

Thinking About Starting Your Own Blog?
This is what you stand to gain from this blogging guide.
- Start a profitable blog in 15 – 20 mins
- Hands-on Approach for Beginners
- In-depth Explanations
- Screenshot Images for Process Clarity
- Expert Guidance & Recommendations
- Common Blogging Mistakes to Avoid
- Best Blogging Tools and Resources
- Access Premium SEO Checklist for Free
- Best Blog Monetization Strategies
And my walkthrough processes…
THIS POST MAY CONTAIN AFFILIATE LINKS, MEANING I RECEIVE A COMMISSION FOR PURCHASES MADE THROUGH THESE LINKS, AT NO COST TO YOU. PLEASE READ MY DISCLOSURE FOR MORE INFO.
If you intend to start a profitable blog, then you’re at the right place and presumably at the right time.
A little background about myself;
I’ve been blogging for 7 years now, I’ve built multiple 5-figure niche blogs, and currently building this blog: Website Hurdles to 6-figures per month blog.
It took me a while to get it right as I battled with a lot of wrong resources on the internet.
I learned deeply about profitable blogging, SEO, and a little about web development and was able to bootstrap my 1st successful blog to $3k per month.
Even though I was earning passively from my blog, I still had a lot of value to give out so I decided to join the corporate world by working as an SEO Expert for a top firm, helping fix content issues, optimizing blog posts and correcting basic site issues this was in 2015.
Fast forward to 2023, I now work as an SEO Manager for a Florida-based agency alongside growing my niche blog.
I rinse and repeat my processes shared here at my day’s job and across clients’ portfolio sites.
in 2022, we closed in $1.2M ARR through leads generated from our blog site, that’s an average of $100k per month.
Is blogging really profitable?
Is it really possible to make a full-time income blogging?
Start by taking a look at the income report from various top bloggers below.
How much do bloggers earn?

Note: Income reports are not constant values as earnings varies slightly monthly.
| Bloggers | Blogs | Estimated Monthly Income |
|---|---|---|
| Tim Sykes | TimothySkykes.com | $1,000,000+ |
| Chiara Ferrangi | Theblondesalad.com | $250,000+ |
| Pat Flynn | smartpassiveincome.com | $200,000+ |
| John Lee Dumas | Eofire.com | $198,000+ |
| Jeff Rose | Goodfinancialcents.com | $135,000+ |
| Ryan Robbinson | Ryrob.com | $50,000+ |
| Holly Johnson | Clubthrifty.com | $21,000+ |
| Bloggers | Estimated Monthly Income |
|---|---|
| Tim Sykes | $1,000,000+ |
| Chiara Ferrangi | $250,000+ |
| Melyssa Griffin | $238,000+ |
| Pat Flynn | $200,000+ |
| John Lee Dumas | $198,000+ |
| Heather Delaney Reese | $175,000+ |
| Jeff Rose | $135,000+ |
| Ryan Robbinson | $50,000+ |
| Holly Johnson | $21,000+ |
Note: Income reports are not constant values as earnings varies slightly monthly.
These figures might seem like a whole lot but you can achieve similar result if you follow the right blogging processes.
In this guide, I’ll be sharing everything you need to know about starting a blog, no b.s just straight-up actionable steps.
And even if you have no technical background, there are no worries as I’ll break down every step in detail.
This is the most in-depth blogging guide on the internet, I’d urge you to bookmark this page so you easily re-visit this article.
Let’s get started.
13 Steps to Starting a Profitable Blog
STEP 1: Select The Right Blogging Niche
STEP 2: Choose a Blog Name
STEP 3: Buy a Reliable Web Hosting
STEP 4: Get a Responsive Blog Theme
STEP 5: Design and Setup Your Blog
STEP 6: Set Up “About Me” and Legal Pages
STEP 7: Install Useful WordPress Plugins
STEP 8: Setup Google Search Console and Google Analytics
STEP 9: Create Awesome Contents
STEP 10: Get Acquainted with SEO Best Practices
STEP 11: Promote Your Content Aggressively
STEP 12: Monetize Your Blog
STEP 13:Maintain Blogging Consistency
STEP 1:
Select The Right Blogging Niche
A blogging niche helps you:
- Attract a specific audience
- Create focused relevant content
- Rank better for search engines
- Build authority & credibility in the field over time.

A blog niche is a specific topic, subject matter or central theme of a blog.
It defines the target audience and writing scope making it easier for bloggers to create content that are more relevant and valuable to their readers.
Mentally, it’s gets interesting having to think about hobby niches and setting up a blog around the things that interest you.
But in reality, not all niches are worth blogging about as some niches are very difficult to monetize or have very little audience.
It’s important to choose a niche within your interest but the stated interest should be a monetizable one making it a profitable niche.
Here are some handful examples of profitable blog niches
Common Examples of Profitable Blog Niches
They include:
- Travel
- Food and cooking
- Fitness and health
- Fashion and style
- Technology and gadgets
- Parenting
- Finance and investing
- Lifestyle
- DIY and crafts
- Home decor and interior design
- Education and learning
- Environment and sustainability
- Book Reviews and Literature
- Weddings and events
- Gaming
Importance of Choosing a Blog Niche
– Attracting the Right Audience:
- Niche blogs naturally attract a specific audience interested in the topic.
- Easier to create content relevant to the target audience.
– Google Loves Niche Sites:
- Niche blogs are easier for Google to index and rank.
- Results in more targeted traffic and higher conversion rates.
– Heightened Confidence and Unique Perspectives:
- Niche bloggers have in-depth knowledge and can offer unique insights.
- Builds authority and fosters reader trust.
Now the big question is..
How do you select the right blog niche?

Follow the steps below to find your perfect niche.
5 Key Steps for Choosing a Blogging Niche:
1. Choose a Niche You Are Passionate About:
Blogging is a long-term game. If you have no solid interest in your niche, you won’t keep at it for long and will certainly give up when you hit certain challenging roadblocks.
Passion keeps you motivated for the long term as it enables you to stay resilient during challenges.
2. Choose a Niche Within Your Expertise or Skill:
Writing about topics you are knowledgeable about gives you more authority and credibility as a blogger.
Your readers will appreciate the valuable insights you bring to the table, and they’ll be more likely to trust your recommendations.
Even Google’s E-E-A-T principle states that “Expertise” and “Experience” are important factors in page quality.
You can’t run an automobile maintenance blog when you have zero knowledge about cars.
And even if you outsource all the content to 3rd party writers, you still can’t tell when the information provided therein is wrong.
NOTE
You might not be an expert or a Pro at a given niche but if you satisfy any of these 2 criteria below then you’re good to go.
- Have a sound knowledge of the subject matter
- Have a certain level of experience within the niche.
3. Choose a Blog Niche with a Sizeable Amount of Keyword Searches
- Are there people seeking answers and helpful information about your niche?
- Are people interested in your niche?
Your chosen niche should have a decent search volume, you certainly don’t want to start blogging about a topic no one cares about or with very low global interest.
So how can you validate if your blog niche have a decent amount of keyword searches?
To do this, we’ll use a free keyword research tool developed by WordStream.
I’ll break this down using an example.
Let’s say I want to start a blog about Golden Retrievers, the Scottish breed of dogs popularly kept as pets in Western countries.

At this point, it’s assumed I’m very much interested in dogs (interest – “Passion”) and I currently have a golden retriever that I’ve trained and lives with me (experience – “Expertise”).
Now it’s time to validate if this breed of dog (my chosen blog niche) have a decent search volume.
- Head over to the free keyword tool using this link: WordStream

- Type the major keyword of your chosen niche and click “FIND MY KEYWORDS”
- Choose your niche industry if it’s in the drop-down menu and set your target region to the United States. It’s best to always target top-tier countries when blogging due to their high-income earning/spending potentials.

- Hit the Continue button and a keyword list will be generated.

You can see “Golden Retriever” has 673,000 monthly searches.
That’s a high amount of search volume and a positive signal that a lot of people are interested in either owning this dog or just wanting to know more about this breed.
And you can be a resourceful help in providing answers with your blog to the search queries.
That’s how you validate a keyword search volume.
You can also use other free keyword tools like the Google Keyword Planner.
The big question here is:
What keyword volume range should one expect to see to validate if it’s worth going after or not?
MY TAKE: Anything within and above 10,000 is a decent search volume.
It’s important to note that these values are not the actual market search volume but a lower estimation as the real search volume is way higher than what you see but a hidden metric only known to Google.
However, make sure you input the primary/seed keyword of your niche and not the keyword variations to have a broad idea of the overall niche search volume.
4. Aim For Ever-Green Ever-Green Blogging Niches
A seasonal blogging niche is a niche that is popular and relevant during a particular season or time of the year.
Unlike evergreen blog niches that maintain a consistent flow of traffic throughout the year, seasonal niches only spark interest for a few days, weeks or months in a year, and can be as bad as once in several years.
Blogging niches centered around things like Christmas gifts, new year quotes & resolutions, Chinese New Year, winter clothing, boating, Fifa World Cup, Halloween, Diwali, or Eid-related products, etc. are all examples of seasonal blog niches.
The truth is: Almost all blog niches have some level of seasonality.
But if the fluctuations throughout the year are small to a point where it’s considered negligible, then it’s not truly seasonal.
By seasonal, I’m talking about a niche where site traffic and revenue are half compared to its yearly peak.
If it’s a summer niche where traffic and revenue is 150,000 visits and $10K in summer but around 70,000 and $5K in winter, then that’s truly seasonal.
Let’s do away with guesswork, how can you validate if a blog niche is truly seasonal or not?
For this, we’ll use a Google tool called Google Trends.
Let’s compare 2 blog niches: Parenting and Boating.
Head over to the site: Google Trends

- Set your target location at the right side of the top navigation bar.
- Input the primary keyword of your niche in the text bar and hit the explore button

- Change the duration from the “Past day” to the “Past 5 years” for better insight.
Here is the Google Trend for Parenting:

And here is the Google Trends for Boating:

You can see that Parenting maintained on average the same level of interest over the years while Boating has it’s peak seasons in June – July, even the US Congress had to declare July 1st as National Boating Day.
In reverse, Boating experiences an all-time low between September – March every year.
This is because boating is predominant in the summer period and lesser in winter.
From this, you can conclude that while Parenting is an evergreen blog niche, boating is a seasonal blog niche.
Bloggers can smartly create sites targeting different seasonal niches and take advantage of the temporal spikes throughout the year.
However, it’s advisable for first-time bloggers to target ever-green blog niches for consistent monthly growth and to fully understand how blogging works.
There’s a certain joy beginner bloggers do have when they start seeing the result of their hard work translating to increased traffic and increased revenue on a monthly scale.
Seasonal blog niches can easily get you demotivated as you only wait for a particular season to see the result of your hard work.
5. Choose a Niche with Multiple Monetization Options
This is often overlooked in the blogging industry, but it’s one of the core factors to consider when choosing a blog niche.
The most common and easy way to earn income from a blog is through display advertising like Google Ads.
But here’s the catch:
“Never choose a blogging niche that solely relies on Ads to generate revenue with little or no other monetization option”
Here are 3 reasons why:
- Blog Ads are a slow path to income generation
- Too many Ads cause sites to load slowly and irritate your readers.
- When not set properly, it kills the user experience
It takes a whole lot of traffic to generate a reasonable amount of money.
It’s common to see blogs with 30,000 monthly pageviews earn about $800 – $1000 monthly depending on the RPM (Revenue per a thousand clicks).
There are also blogs with the same 30,000 monthly pageviews earning over $10,000 due to the presence of other nicely added forms of monetization.
The 3 recommended Display Ad Networks are Ezoic, Mediavine and Adthrive.
However, you need a minimum of 100,000 pageviews to join Adthrive’s Network and a minimum of 50,000 monthly sessions to join Mediavine.
And even if Ezoic made it possible for new bloggers with less than 10,000 monthly pageviews to join the platform, you still won’t generate much income from the display advertising with less than 10k monthly pageviews.
There are several ways to monetize your blog, they include:
- Affiliate Marketing
- Digital Downloads
- Digital Courses
- Niche Services
- Consultations
- Sponsorships
- Mentorships
Let’s highlight a few examples of bloggers doing it right:
Michelle Gardner of MakingSenseOfCents.com, a finance and lifestyle blog attributes 63% of her blog income to affiliates (for the month of August 2019), a large chunk to sponsored partnerships and her courses and she earns over $100,000 per month blogging.

Just 2.0% of her income comes from display advertising.
This means if she had only display ads as the sole of monetization on her blog, she would have been left with $2,000 at the end of the month as opposed to $100,000+ when she employed other monetization strategies with the same audience size.
Isn’t this amazing?
Pat Flynn, founder of Smart Passive Income has made over $300,000 from a single affiliate agreement with ConvertKit.
He uses and recommends ConvertKit as the best software for email list management and makes nice affiliate commissions from his blog readers.

The Penny Matters charges anywhere from $175 – $550 for sponsored posts on their blog
Ryan Robinson is another pro blogger who charges $1,500 per sponsored post.
We’ll talk more about blog monetization in further section.
NOW OVER TO YOU
Are there multiple monetization options for your chosen blog niche?
Follow this 5-question tag to validate if such exists in your case.
- Apart from display Ads, what are top bloggers in your niche doing to make money?
- Are there already known products your audience will most likely patronize and you can promote on your blog to earn affiliate commissions?
- Are there niche-related services you can render?
- Are there possibilities to create valuable digital products that people are willing to pay for within your niche like e-books, guides, courses, etc?
- Is it possible to offer virtual/on-call digital services like consultations/mentorships?
If you have a positive answer to any of these questions, then you are good to go.
EXPERT TIP
A foresight to guide you when selecting a blog niche with multiple monetization options is to pick a niche whose audience are generally middle-class to high-income earners as these categories of people have an average to high spending capability.
This makes it easier to monetize physical/digital products and services to them.
A blog niche centered around cartoons and anime might be valuable but doesn’t attract a high-end audience.
Mostly consisting of kids and teenage people with low spending capabilities and not a niche with solid sellable products.
STEP 2:
Choose A Blog Name
Atimes, simple things like brainstorming a blog name can turn out to be a difficult task.
In this section, I’ll reveal my 9-step process hack for brainstorming a blog name.
We’ll also talk about:
- helpful blog name generators and
- criteria of a good blog name.

It’s time to a brainstorm a name for your blog.
This process actually seems easy but it’s not because a lot of the good names out there are already taken/registered.
I’ve created 9 different brainstorming processes to help you come up with the blog name.
You should find your desired name within any of the outlined processes. Let’s begin.
Process 1: Gathering Focus Keywords
You already know your niche from above, now it’s time to gather surrounding keywords.
Let’s say you intend to start a blog in the food niche.
You should start by gathering keywords like Recipes, Baking, Food, Cuisine, Culinary, Cook, Meals, Spice, etc.
After you’ve brainstormed all possible keywords, take out a pen and paper and write them out or use your preferred writing tool.
Now using these keywords try to come up with a blog name.
Here are a few food blogs that got this process right.
- SkinnyTaste.com
- ChefsPencil.com
- TheRecipetCritic.com
- SteamyKitchen.com
- MinimalistBaker.com
- SmittenKitchen.com
- Simplyrecipes.com
Once you’ve come up with a blog name, check to see if the name is available using the checker tool below.
Process 2: Checking Out Competitors’ Blogs:
This will give you some ideas of what works in your industry.
Take a look at your competitors’ blogs and jot down your findings.
- How do they sound?
- What was your first impression of the names?
- How long are they?
Now think to yourself, can you come up with something similar but different?
At times it makes more sense to stick with what works than re-inventing the wheel.
To see your competitors, take the keywords you’ve discovered from process 1 above and type them into Google.
You’d see a bunch of sites relating to the input keywords.
To better refine your search, type:
“Keyword” + Blogs on Google.
Process 3: Using a Thesaurus:
This is an indispensable blog naming tool as many bloggers (including myself) has considered it helpful.
A thesaurus is a book, software program, or online service that provides alternative or similar words to a word.
For example, searching for “happy” may return synonyms like “cheerful,” “delighted,” ” and “elated.”
You can also utilize thesaurus to find similar name inspirations and removing the monotony from your content.
Thankfully, an online thesaurus service exists and it’s freely available.
Free tool: Thesaurus.com
How to use Free Online Thesaurus To Generate Blog Name
Let’s say you’re setting up a blog in the finance niche and you’ve brainstormed related keywords like investing, budgeting, stocks, tax, credits, finance, debt, wealth, and insurance.
Pick a keyword and come up with a blog name. In our case, we’ll pick “Investing” and our chosen blog name will be “InvestingGuide.com”
Let’s check if the name is available.
It’s not, now let’s see Thesaurus in action.
- Plug a term into thesaurus. Let’s input the word “Guide”

Now we have a bunch of synonyms for Guide
- Take variations of the synonym with the main word and check if the domain name is available.
Handpick only the ones that make sense to you and merge them with “Finance”
Now we have new variations of domain names like “Finance Model”, “Finance Genie”, “Finance Guru”, and “Finance Scout”.
- If the name isn’t available, repeat the process with other top-related keywords on your list.
Doing this will give you further insights and will help you generate tons of possible domain names for your blog.
Process 4: Abbreviations and Acronyms
You might come up with a blog name but it might appear too long, your best bet might be to use abbreviations.
Abbreviations and acronyms are easier to remember and avoid any typos when people enter the name in their browser.
For example:
A tech blog can be named EDG = Everyday Gadget
An automobile blog YDM = Your Desired Mechanic
A fashion blog EWO = Elite Wears Only
Real-life Example of a Popular Blog with an Abbreviated Name
WPBeginner: An Insightful blog for people getting started with WordPress (WP)
Process 5: Create a Portmanteau
A portmanteau is a word that comes from blending or merging two words together.
This process of blog naming has a lot to do with creativity.
Below are some popular portmanteaus:
- Binance — from binary and finance
- Labrador doodle — From Labrador doodle
- Vlog — from video and blog
- Lenovo — from legend and nobody (Latin word for new)
This method allows you to create a unique expression, domain name, and trademark.
The basic idea is to combine two keywords in your niche to form a new word.
Albeit, tread this path with caution; an awkward portmanteau will make you look stupid.
How to Name Your Blog Using The Portmanteau Technique
– Manual Process: Get 2 niche keywords from your list and try to come up with something sensible.
– Use a Portmanteau Tool: Cut down on the time by using the Mix Name tool by NameCombiner.com

Input the 2 words and click on “Generate”, it will output a bunch of portmanteaus.
Pick any that best suits your brand and style.
Process 6: Consider Words in Another Language
You can translate one or more of your keywords in another language and use the finding to name your blog.
For example: The blog name TechGuru.
Guru here is a Sanskrit term for a “mentor, guide, expert, or master” of certain knowledge or field.
To get started, use Google Translate to search for words in other languages.
Process 7: Use Alliteration and Assonance
Merriam-Webster dictionary defines Alliteration as the repetition of usually initial consonant sounds in two or more neighboring words or syllables
Alliterations make phrases catchy and memorable. Here are a few examples:
- Road Rage
- Big and Bad
- Soccer Stats
Alternatively, you can use assonance.
Assonance is the repetition of the same or similar vowel sounds within words, phrases, or sentences.
- Fight Night
- Dip Chip
- Bold and Cold
Process 8: Use Your Name
Do this only if you intend to:
- Position yourself as an authority in your industry
- Build your blog as your personal brand
Neil Patel of NeilPatel.com positioned himself as a digital marketing expert.
The success of his blog was also an avenue for him to showcase his unique services as an expert and promote his Growth Agency, NP Digitals.
Process 9: Use a Blog Name Generator
Thanks to AI and Machine Learning, we now have Blog Name Generators.
A blog generator allows you to generate list of unique blog names by inputting a couple of keywords.
Top 6 Blog Name Generators
- WPBeginner business name generator
- Blog Name Generator (BNG)
- Nameboy
- Isitwp
- Name Station
- Domain Wheel
This brings us to the end of our 9 Brainstorming Process for coming up with a blog name.
If you’ve successfully come up with a blog name/domain that’s available, does this means you should go ahead and register it?
Not yet.
Go through the criteria of a good blog name listed below to validate if it makes the mark.
Criteria of a Good Blog Name
Use these 7 bullet point to vet if your chosen blog name is a good one or not.
A good blog name should be:
- Easy to pronounce
- Easy to spell
- Related to the niche of the blog
- Memorizable enough to stand out
- Available as social media names
- Short; not more than 4 words
- Not mistaken for something else
If it passes these checks then you’re good to go.
STEP 3:
Buy a Reliable Web Hosting
You can’t afford to get this wrong.
Your choice of web host will either keep you in the game or be the cause of your downfall.
2 Major Things to Consider When Choosing a Web Host:
- Performance
- Reliability

All profitable blogs are self-hosted.
Self-hosting your blog will give you the leverage to handle your blog under your own terms.
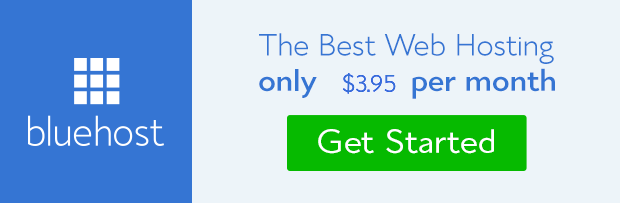
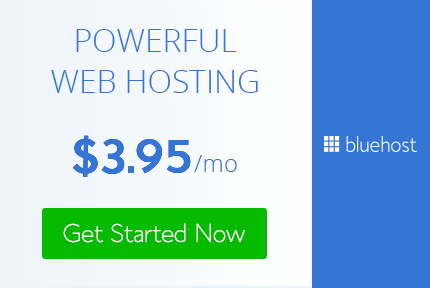
For blog hosting, your best option is Bluehost.
See reasons why Bluehost remains our No. 1 recommendation.
- Great pricing: with as low as $2.95/month, you can access this standard hosting platform.
- Free Domain name: With Bluehost, you get a free domain name for the first year.
- 24/7 customer support: Not every company can boast 24/7 customer support, especially at low entry-level prices.
- Free SSL certificate: This is required to authenticate your website’s identity and encrypt important site information. Thankfully, Bluehost provides SSL certification for free.
Ready to take the leap, click the button below to get Bluehost for as low as $2.95/month.
The button opens Bluehost in a separate tab. Use the processes in this guide to navigate your actions on Bluehost.
Click the “Get Started” button.

You’ll be prompted to the next slide, as shown below.
The cost per month reduces when a longer-term plan is chosen, so I suggest you choose a 3-year package (36 months). This way you’ll be paying less money per month.

There are different hosting packages to choose from.
As a beginner, the “BASIC” plan is perfectly okay.
Click the Select button right under the “BASIC” plan.

You’ve already figured out a domain name from step 2 above right?.
Now input that name in the “Create a new domain” column, click the “Next” button, and fill up the account information.

Fill up your account information and confirm the package details.


Now, uncheck every box in the “Package Extra” except the “Domain Privacy+Protection, “and provide your credit card details for the payment.

Fill up the fields, accept the terms and conditions, then click submit.
Bluehost does have a 30-day refund guarantee, if you are dissatisfied with the service, but I strongly believe you’ll enjoy the experience.

Lastly, create your password to complete your blog hosting setup.


Bluehost provides several blog design options, but scroll to the bottom and click Skip This Step (we’ll handle that aspect in the next section).

From here, you’re directed to a new page where you need to click on the “Start Building” option.

Next, select what type of site you plan to create, and WordPress will help you with prompts.
You can also click “I don’t need help” to go right to your dashboard.
Finally, enter your “Site Title” and your “Site Description.”

You have successfully installed WordPress.
Move to the next step.
STEP 4:
Get A Responsive Blog Theme
Your theme represents the general outlook of your blog.
You do not need to spend $999 hiring a professional web developer or web development agency.
Free themes aren’t good options as well due to it’s limited customization.
All you need is a cost-effective responsive blog theme.
Instead of coding your own design from scratch or hiring a developer, a theme allows you to pick a pre-made design for your blog.
This means that you can design exactly how you want your blog to look without having any prior coding background or design expertise.
There are dozens of free themes you can find under the Appearance→Themes, in your blog dashboard.
However, the configurations available on free themes are largely limited, making it impossible to make majors edit or changes to the theme.
If you wish to have a more premium, professional, and customizable theme, my #1 recommendation will be Divi theme as it is lightweight, cheap, and very beginner-friendly.

Official website: Divi
Here are a few reasons why professional bloggers should use the DIVI theme:
- 2,000+ total design layouts
- 100+ full website pack
- 40+ website elements
- Responsive customizations
- Inline text editing
- Drag and drop page builder
- Social buttons integration
- Email opt-in integrations
- Multiple landing pages
- Ability to build visually with stunning visual builder.

This blog: Website Hurdles is powered by DIVI alongside my other 2 blogs.
The major reason why I use and recommend DIVI is because it’s very easy to customize compared to other paid themes and has a very professional outlook.
Let’s quickly install and configure the DIVI theme.
To get started, click the button below. It will lead you to the DIVI webpage.
Click the “PRICING” tab at the top right corner and select your preferred package plan.

Select your preferred package plan, proceed to the account setup page and fill up the required fields.

Agree to the “Terms of Service” and uncheck the “Get Update Via Email” to avoid getting multiple news mails.

Finally, hit the COMPLETE REGISTRATION button.
You’ve successfully purchased DIVI.
Now Log into your DIVI account.

Download the DIVI theme from your dashboard.
Don’t bother about downloading the DIVI builder plugin, it’s already a feature of the DIVI theme.
The downloaded draft is a zip file, head over to your WordPress dashboard and upload the DIVI zip file.
Follow this navigation on your WordPress dashboard to achieve this:
Appearance > Theme > Add New Theme > Upload Theme
After installing and activating the theme, visit your blog URL on Google, and you’ll see it looks just like this.

Congrats, you just launched your blog.
DIVI Theme Video Recap
Here’s a video recap on Divi theme installation.
At this point, you’ve successfully completed the processes:
- Decided your blogging niche
- Gotten a domain name
- Hosted your blog and
- Installed a responsive theme
You can decide to give yourself a treat before moving on to the next step.
STEP 5:
Design And Setup Your Blog

It’s time to give your blog the professional outlook that it deserves.
The recorded video below will guide you through the major customization process.
After this is done, you’ll also have to set up your blog pages and Legal Pages.
The legal pages consist of the privacy policy page, terms and conditions, and disclaimer.
While the blog pages contain majorly of “Home” page, “About Us” page, and “Contact” page.
Still planning to launch your blog?
Get started with Bluehost for just $2.95/month (63% off) and follow up with this guide.

STEP 6:
Set Up “About Me” and Legal Pages
This section contains tips to write a good about me page.
It also guides you on setting up your blog’s legal pages.
Legal pages mostly consists of:
- Privacy Policy
- Disclaimer and
- Disclosure Policy
Customize your blog navigation menu to improve user experience, ensuring easy access to important sections of your blog.
Ideally, your header/primary menu should be Home page, Blog page, About and Contact Us page.
Take a look at the top of this blog to see my menu.
Your footer menu should contain your legal pages and other additionals.
– Crafting An About Me Page
An About Me page is vital for any blog, allowing readers to connect and understand your site’s value.
It builds trust, showcases expertise, and sets your blog apart.
Many find writing this page challenging, so here are 9 steps to writing a good About Me page:
1. Craft Your Brand Story: Share how your journey led to blogging and any personal challenges overcome.
2. Define Your Mission/Vision: Clearly state the reason behind starting your blog or business.
3. Show Brand Evolution: Illustrate changes your brand has undergone since inception, highlighting developments.
4. Highlight Skills and Achievements: Incorporate accomplishments into your narrative subtly, keeping them relevant.
5. Mention Offerings: Briefly discuss services/products, redirecting readers to dedicated pages for details.
6. Feature Testimonials: Include select feedback to build credibility without overwhelming the page.
7. Optimize Visual Appeal: Use high-quality photos and break up text for easy readability.
8. Strong Call-to-Action (CTA): Guide readers with a clear and compelling CTA, prompting desired actions.
9. Regular Updates: Keep the page current, showcasing recent achievements and aligning with evolving goals.
Are you a Pinterest User?
If yes, do well to pin this image.

Include Legal Pages on Your Blog
Including legal pages on your blog is an essential step in legally protecting your online presence.
These pages outline important information, set expectations, and establish the terms of use for visitors to your blog.
Here are some crucial legal pages to have on your blog and tips on producing them:
1. Privacy Policy: A Privacy Policy informs users about the data you collect, how it is used, and how you protect their privacy.
It should include details on cookies, analytics, data retention, and any third-party services you use.
To produce a Privacy Policy, consider consulting with a legal professional or using online Privacy Policy generators tailored to your jurisdiction and blogging platform.
2. Terms of Use: The Terms of Use page outlines the rules and responsibilities for visitors using your blog.
It covers aspects such as acceptable use, intellectual property rights, disclaimers, liability limitations, and dispute resolution. Similar to the Privacy Policy, you can consult legal experts or use online generators to create a customized Terms of Use page.
3. Disclaimer: A Disclaimer page clarifies the limitations and scope of your blog’s content. It states that the information provided is for general purposes only and not professional advice.
Consider including disclaimers specific to your niche or industry, addressing topics like health, finance, or legal matters. Craft your disclaimer to be clear, concise, and easy for your audience to understand.
4. Copyright Notice: A Copyright Notice page asserts your ownership rights and alerts users that your content is protected by copyright law.
State that your blog’s content, including text, images, and media, is your intellectual property. Include the copyright symbol (©), the year of publication, and your name or blog’s name.
This page serves as a notice to others that copying or using your content without permission may result in legal consequences.
5. Disclosure Policy: A Disclosure Policy is particularly important for blogs that include sponsored content, endorsements, or affiliate marketing.
It discloses your relationships with advertisers, sponsors, or affiliates and clarifies that you may receive compensation for certain content.
Be transparent and disclose any potential conflicts of interest to maintain the trust of your audience.
When producing these legal pages, it’s crucial to ensure accuracy, clarity, and compliance with applicable laws and regulations.
STEP 7:
Install Useful WordPress Plugins
In this section, I’ll show you the basic plugins you need to run a successful blog.
Although plugins are known to add functionalities to your WordPress blog, not all plugins are worth downloading.
Too many plugins can slow down your blog and poorly maintained plugins can crash your site.
To be on the safe side, follow the recommendations on this section & do your research if need arises for additional plugins.

A plugin is a tool or piece of software installed onto your WordPress blog to add different functionalities to your site.
Plugins are also used for adding some special features to your blog.
Unfortunately, too many plugins can slow down your blog.
The more plugins you have installed, the slower your blog (especially if they are bad ones).
Therefore the aim here is to keep the numbers of plugins as low as reasonably possible.
And that’s why I’ll show you only the important plugins needed to have a sound and profitable blog.
Plugin 1
RANK MATH
Rank Math is the best SEO WordPress plugin for anyone building out their blog.
Rank Math makes it easy for anyone to optimize their content with built-in suggestions based on widely-accepted best practices.
As a beginner, stick to the free version of Rank Math, it’s enough to get the job done.
To install Rank Math, visit their official website by clicking the link: RANK MATH.
Click on “MY ACCOUNT” to create your Rank Math Account.

Download Rank Math Plugin by either clicking the “Download” button in the top navigation bar or by clicking the “DOWNLOAD FOR FREE” button.

Save the plugin.
The plugin comes in a zipped folder.
Don’t unzip it, just leave it in it’s default state.
Log into your WordPress dashboard and navigate to “Plugins” at the left side of your screen.

Click on “Upload Plugin,” choose the saved zipped file and install the plugin.


It takes few minutes to complete the installation.
Once the plugin installation is completed, click on “Activate Plugin.”
You have successfully activated Rank Math Plugin.
Follow the Rank Math Setup to start using Rank Math SEO.
Plugin 2
Wordfence Security

Site security is the most important factor when creating a profitable blog.
You certainly don’t want your effort to be hijacked by hackers or malicious software.
Hackers are moving freely all over the internet, looking for profitable blogs to attack.
So it will be best if you take the necessary actions to protect your blog.
Wordfence security plugin detects and filters harmful traffic, and the plugin will send you an email notification whenever something strange occurs.
It has a malware scanner that allows you to scan your website’s core files, themes, and plugins for malware.
To install this security plugin, follow the steps below.
On your WordPress dashboard, click “Plugins” >> “Add New.”
Type Wordfence on the search bar.
Make sure to click on the correct Wordfence plugin; it has over 4+ Million Active Installations.

Install and activate the Wordfence plugin.
Plugin 3
UPDRAFTPLUS

UpdraftPlus is the most popular WordPress backup plugin. It allows you to automatically backup your complete site and safely stores your site backup file on a cloud service such as Google Drive, Dropbox, UpdraftVault, etc.
It has an option to manually backup your site with a single click and also, you can restore your site with one click.
The good part is all these updraft features are available for free.
By now, I’m certain you’re conversant with downloading WordPress plugins.
Follow the same process to download UpdraftPlus from your WordPress dashboard.
Plugin 4
EWWW Image Optimizer

Images are larger in size than plain text, which means they take longer load time which slows down your blog.
To improve your blog speed, you need to optimize your images for the web.
Image optimization will increase your site load speed and help you get more traffic.
Ewww Image Optimizer is a good image compression plugin for WordPress.
It’s simple to use and can optimize images automatically in real-time.
Even though your images are being compressed, it’ll be tough to tell the difference between compressed and uncompressed in terms of quality.
To download this plugin,
go to your WordPress dashboard, click on “Plugins,” and follow the steps outlined in the previous plugin.

Other Helpful Free WordPress Plugins
– TOC+: For adding a table of content to your blog articles, helpful for SEO and long-form articles.
– TablePress (Free): For creating and adding tables (rows & columns of data) to your articles.
STEP 8:
Setup Google Search Console and Google Analytics
Two must-have metric platforms for blogging are:
- Google Search Console and
- Google Analytics
In this section, I’ll walk you through setting up and harnessing the power of these platforms to elevate your blogging game.

1. Setting Up Google Search Console
Google Search Console is your gateway to understanding how your website appears in Google search results.
Follow these steps to get started:
Step 1: Verification
- Sign in to Google Search Console using your Google account.
- Add your website URL and verify ownership through various methods like HTML tag, HTML file upload, or DNS record.
Step 2: Submitting Sitemap
- Generate and submit a sitemap of your website to help Google understand its structure and content better. The RankMath plugin can help you generate the sitemap for your blog.
2. Setting Up Google Analytics
Google Analytics is a powerhouse for tracking website traffic and user behavior. Here’s how to set it up:
Step 1: Account Creation
- Sign in to Google Analytics using your Google account and create an account for your website.
Step 2: Property Setup
- Add a new property, providing your website URL, and choose the preferred data sharing settings.
Step 3: Install Tracking Code
- Copy the tracking code generated and insert it into the header section of your website’s HTML code. Alternatively, use a plugin if you’re using a CMS like WordPress.
Setting up Google Search Console and Google Analytics for your blog equips you with actionable insights to refine content, drive more traffic, and enhance user experiences.
STEP 9:
Create Awesome Contents
We’ve come a long way, now it is time to start sharing your thoughts, your views and express yourself on topics within your niche.
In this section, we’ll talk about:
- tips to write high-quality blog posts and
- blog post formatting techniques.
Let’s get started.

Tips for Writing High-Quality Blog Posts
Here is a guide to help you create high-quality blog posts:
– Choose a Topic: Perform keyword research and choose a compelling and relevant topic that interests your readers.
– Conducting Topic Research: Research your chosen topic thoroughly to provide accurate and up-to-date information.
– Creating a Well-Structured Content Outline: Develop an outline to organize your thoughts and ideas logically.
– Crafting an Engaging Headline: Create a captivating headline to make a great first impression and grab readers’ attention.
– Hooking Readers with an Intriguing Introduction: Use interesting facts, questions, or anecdotes to engage readers in your introduction.
– Providing Valuable and Actionable Content: Offer practical tips and valuable insights that cater to your readers’ needs.
– Incorporating Research Data and Facts: Enhance credibility by including relevant research data and facts.
– Write in a Conversational Tone: Communicate with readers in a friendly, conversational manner.
– Incorporating Visuals: Use high-quality images, infographics, and videos to enhance your blog post and make it more engaging.
– Adding Call-To-Action (CTAs): Encourage readers to take action, such as signing up for an email list or exploring your product.
– Editing and Proofreading: Ensure your blog post is error-free and polished, using tools like Grammarly for editing.


– Optimizing for SEO: Improve your post’s visibility in search engine results by incorporating relevant keywords and clear headings.
– Crafting a Compelling Conclusion: Summarize key points and reinforce takeaways in your conclusion.
– Polishing the Formatting and Design: Enhance the reader’s experience with clean formatting and thoughtful design.
– Adding a Featured Image: Include an eye-catching featured image that represents your blog post.
After writing your blog post, it needs to be formatted. Here are the core steps to follow:
How to Properly Format Blog Posts
1. Match the reader’s intent early in the blog post
To capture and retain your readers’ attention, it is crucial to address their intent early in the blog post.
The introduction should clearly state what the article is about, what value it offers, and why readers should continue reading.
For question-based topics, you can start the body of the content by directly answering the question.
This way you quickly satisfy the search query while you break it down for further explanation across the body of the content.
By aligning with their intent, you establish relevance and increase the chances of them staying engaged throughout the post.
2. Use the Right Heading Markup Structure
- Title: Use the H1 heading tag for the title.
- Body: Use H2 headings for major sections and H3 headings for subsections to create a visual hierarchy.
- Conclusion: You can use H2 or H3 heading for the conclusion section.
3. Make Your Blog Post Skimmable and Scannable
Skimming is reading speedily to get a general overview of the material.
Scanning is reading rapidly to find specific facts.
While skimming tells you what general information is within a section, scanning helps you locate a particular fact.
In today’s fast-paced digital world, readers often skim through content to quickly find the information they need.
Making your blog post scannable allows readers to grasp the main points, scan for specific details, and decide whether to read the entire post.
Techniques for Enhancing Skimmability & Scannability
- Use subheadings: Break your content into sections and use descriptive subheadings. This helps readers navigate through the post and find relevant information easily.
- Utilize bullet points and numbered lists: Presenting information in a list format enhances readability and makes key points stand out.
- Highlight important keywords: Use bold, italics, or underlining to emphasize important words or phrases, making them more noticeable.
- Incorporate short paragraphs: Lengthy paragraphs can be overwhelming to readers. Keep paragraphs concise and focused to maintain reader engagement.
- Include visual elements: Images, charts, or infographics can break up the text, add visual appeal, and convey information more effectively.
4. Short, concise sentences and paragraphs are vital
Long, complex sentences and paragraphs can be challenging to read and understand.
Opt for shorter sentences and paragraphs to maintain reader engagement. Here’s how to go about it.
- Aim for an average sentence length of 15-20 words.
- Limit paragraphs to 3-4 sentences, focusing on a single idea or concept.
- Use transitional phrases to smoothly connect ideas and improve flow.
5. Short, concise sentences and paragraphs are vital
Long, complex sentences and paragraphs can be challenging to read and understand.
Opt for shorter sentences and paragraphs to maintain reader engagement. Here’s how to go about it.
- Aim for an average sentence length of 15-20 words.
- Limit paragraphs to 3-4 sentences, focusing on a single idea or concept.
- Use transitional phrases to smoothly connect ideas and improve flow.
6. Quotes and block quotes
Quotes and block quotes are effective in providing evidence, supporting arguments, or featuring insights from experts.
- Use quotation marks for shorter quotes embedded within the text.
- For longer quotes or significant excerpts, consider using block quotes. Indent the quote, and use a different font style or highlight it to differentiate it from the main text.
7. Use a Table of Content
Including a table of contents at the beginning of your blog post provides several benefits.
It allows readers to quickly navigate to the sections that interest them, improves the overall user experience, and encourages readers to explore more of your content.
8. Blog Post Aesthetics and Readability
Aesthetics and readability significantly impact the user experience and how readers perceive your blog post. Well-designed and visually appealing posts are more likely to attract and retain readers.
– Font selection
Choose a legible font for your blog post. Sans-serif fonts like Arial or Verdana are generally easier to read on screens.
Use font sizes that are comfortable to read, typically between 12 and 16 pixels.
– Color schemes
Select a color scheme that complements your brand and is visually pleasing. Use contrasting colors for text and background to ensure readability.
Avoid using too many colors, as it can be distracting.
– Use of whitespace
Whitespace, also known as negative space, refers to the empty space between elements in your blog post. It helps create visual breathing room, improves readability, and highlights important content.
Use ample whitespace to give your blog post a clean and uncluttered look.
Publish and Share Your Blog Post When Ready: Don’t strive for perfection; else you’ll spend months creating one blog post.
Publish your post once it meets basic quality standards and share it with your audience.
You can always update it with new ideas later.
5 Common Blog Post Formatting Mistakes and How to Avoid Them
| No. | Common Blog Post Formatting Mistakes | Tips to Avoid Them |
|---|

STEP 10:
Get Acquainted with SEO Best Practices
SEO – Search Engine Optimization
To ensure your content reaches a wider audience, it’s crucial to understand and implement SEO practices. It is the key to enhancing your blog’s visibility on search engines like Google.
In this section, we’ll talk about:
- Key SEO Practices for New Bloggers
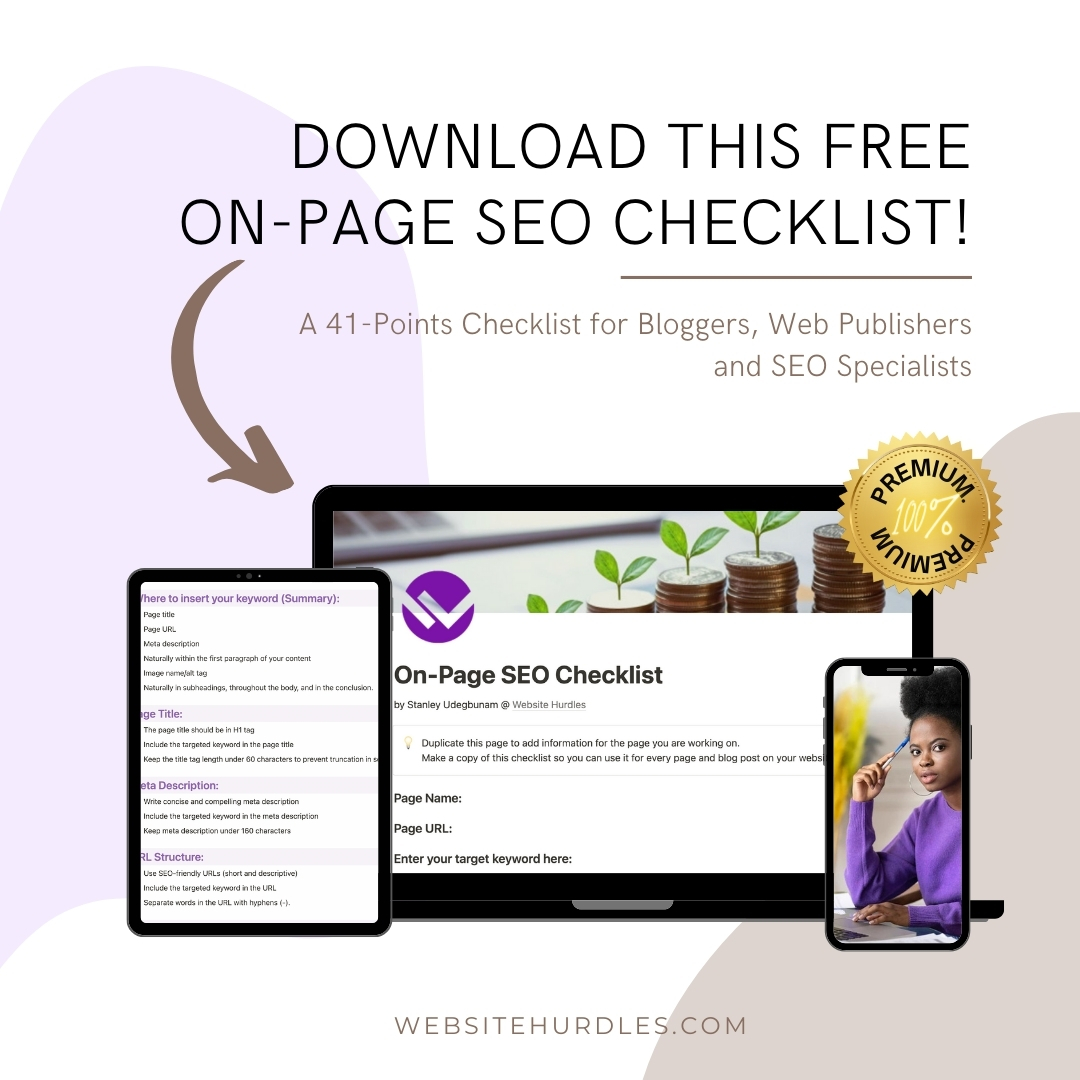
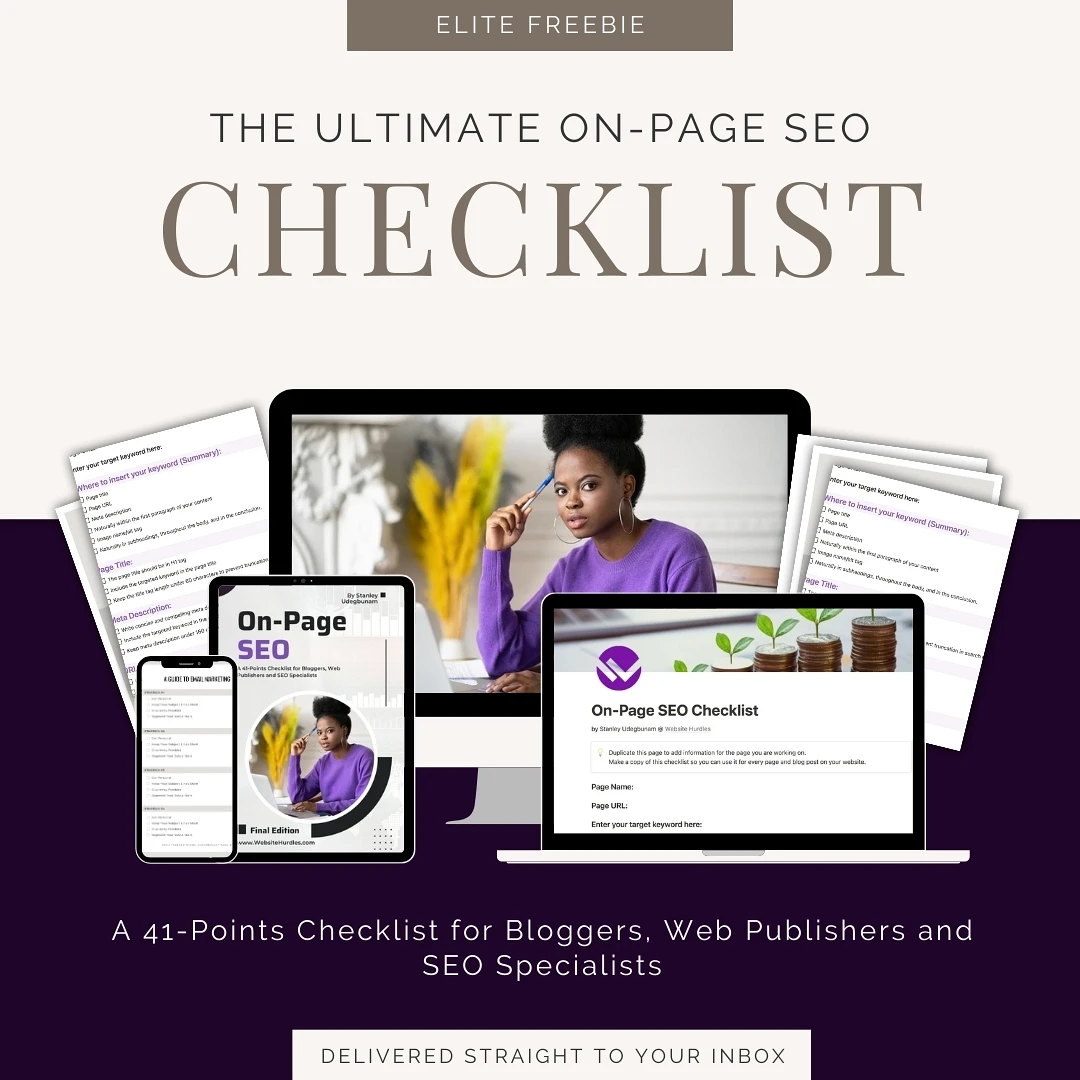
To help you get started with ease, I’ll also give you access to my PREMIUM ON-PAGE SEO CHECKLIST for free. Let’s dive right in.

What is SEO?
SEO is a set of practices aimed at improving a website’s visibility on search engines.
When users search for information, products, or services online, search engines like Google aim to provide the most relevant and valuable results.
SEO helps your blog rank higher in these search results, making it more likely that users will find and visit your site.
Key SEO Practices for New Bloggers
1. Keywords and Content Strategy
- Keyword Research: Learn to identify relevant keywords using tools like Google Keyword Planner or SEMrush to understand what users are searching for.
- Content Creation: Develop high-quality, informative content centered around these keywords, aiming for relevancy, depth, and readability.
2. On-Page Optimization
- Title Tags and Meta Descriptions: Craft compelling titles and descriptions that accurately represent your content while enticing clicks.
- Header Tags and Structure: Use headers (H1, H2, H3) to structure content, making it more readable for both users and search engines.
- Optimize images with descriptive alt text.
3. Off-Page Optimization
- Link Building: Acquire high-quality backlinks from authoritative sites to boost your blog’s credibility and ranking. Guest posting is a good way to build quality links to your site.
- Social Media Presence: Engage on social platforms to drive traffic and amplify your blog’s reach.
4. Technical SEO
- Website Speed: Ensure your site loads quickly, optimizing images and minimizing unnecessary plugins.
- Mobile Optimization: Make your blog mobile-friendly to cater to the growing number of mobile users.
NOTE
If you use a good website theme like DIVI and a quality web host like Bluehost then you don’t need to worry about site speed as long as you don’t bloat your blog with unnecessary WordPress plugins.
SEO Pitfalls to Avoid
1. Keyword Stuffing:
- Avoid overloading your content with keywords; it can harm your rankings.
2. Ignoring User Experience:
- Focus on a clean and intuitive website design.
- Prioritize easy navigation for users.
3. Neglecting Analytics:
- Utilize tools like Google Analytics to monitor your blog’s performance.
- Regularly review analytics data to understand user behavior and make informed decisions.
Access to My Premium On-page SEO Checklist
To help bloggers get better with SEO, I’ve decided to give away my On-Page SEO checklist to my readers.
This checklist mirrors my workflow and contains all major on-page SEO processes that I can share with both bloggers here on Website Hurdles and my in-house team of SEO specialists at my full-time job as SEO Manager.

To access the checklist, sign up through the form field below and a copy will be automatically sent to your email in splits of seconds
STEP 11:
Promote Your Content Aggressively
Painful Truth: Your writing effort will be a waste if no one sees and consumes your articles.
In this section, we’ll talk about:
- steps to promote your blog posts and
- winning strategies to achieve effective promotions as a new blogger.

Don’t just stop at creating quality content, find a means to promote your content.
Promoting your content is akin to letting the world know about your blog’s existence. Without effective promotion, even the most well-crafted posts might go unnoticed.
Comprehensive content promotion involves utilizing various channels and strategies to maximize the visibility of your blog.
SEO is a form of organic promotion, but it takes a couple of months to see the results of your SEO efforts especially when starting out.
As a result, bloggers are advised to brainstorm other means of content promotion.
Let’s delve into the various steps for new bloggers to promote their content effectively and winning strategies to achieve effective promotions.
1. Leverage Social Media
Social media platforms are powerful tools for content promotion. Utilize platforms like Facebook, Twitter, Instagram, LinkedIn, and Pinterest to share your blog posts and engage with your audience.
Strategies:
- Create Shareable Content: Craft compelling headlines and visuals that encourage social media sharing.
- Consistent Posting: Establish a posting schedule to maintain a regular presence.
- Engagement: Respond to comments, ask questions, and foster a sense of community.
2. Email Marketing
Building an email list allows you to directly reach your audience with new content and updates.
Strategies:
- Create an Opt-In Incentive: Offer a freebie to encourage sign-ups.
- Segment Your List: Tailor your emails based on audience interests.
- Consistent Newsletters: Regularly update your subscribers with new content.
3. Engage in Online Communities
Joining relevant online communities can amplify your content’s reach and connect you with like-minded individuals.
Strategies:
- Provide Value: Contribute genuinely to discussions and offer valuable insights.
- Share Your Content Sparingly: Share your blog posts when relevant to the discussion.
4. Collaborate with Other Bloggers
Building relationships with other bloggers in your niche can lead to collaborative opportunities and mutual promotion.
Strategies:
- Guest Posting: Write guest posts for other blogs to showcase your expertise.
- Cross-Promotion: Collaborate on projects or share each other’s content.
Promoting your content comprehensively involves a multi-faceted approach, incorporating social media, SEO, email marketing, community engagement, and collaboration.
As a new blogger, embracing these strategies will not only boost your content’s visibility but also foster a vibrant and engaged audience.
STEP 12:
Monetize Your Blog
In this section, we’ll talk about the top strategies for monetizing your blog and turning it into a revenue-generating machine.
From affiliate marketing to sponsored posts and beyond, I’ll reveal the best ways to monetize your blog.
The good part..
the strategies discussed in this section are applicable across all blogging niches.

Here are 8 Best Ways to Monetize Your Blog
1. Affiliate Marketing
Affiliate marketing is a powerful way to monetize your blog.
By partnering with companies and promoting their products or services, you can earn a commission for every sale or action that originates from your referral.
To succeed in affiliate marketing, it’s essential to choose relevant products or services that align with your blog’s niche and audience.
Incorporate affiliate links strategically within your content, and consider writing product reviews, comparison guides, or tutorials to increase conversions.
One of the easiest ways to get products to advertise on your blog is by joining affiliate networks like Amazon Associates, Commission Junction, and ShareASale.
See my guide on: 31 Best Highest Paying Affiliate Programs for Bloggers.
2. Display Ads
Display Ads are the most common way to monetize a blog. It simply involves placing ads on your blog to generate revenue.
Optimize your ad placements for maximum visibility, such as above the fold or within the sidebar. However, be cautious not to overwhelm your readers with excessive ads, as it can negatively impact the user experience.
With a sizable amount of traffic, you can get on display Ad networks like Google Adsense, Ezoic, Adthrive, and Mediavine.
The table below displays traffic requirements, payment methods and minimum payment thresholds of the different major Ad networks.
| Ad Network | Traffic Requirement | Payment Method | Minimum Payment Threshold |
|---|
3. Sponsored Posts
Sponsored posts offer a lucrative opportunity to collaborate with brands and get paid for promoting their products or services.
When creating sponsored content, it’s crucial to maintain authenticity and transparency. Choose brands that align with your blog’s niche and values, and disclose the partnership clearly to your audience.
Craft engaging and informative posts that provide value while integrating the brand’s message organically.
4. Sell Digital Products
Creating and selling your own digital products is an excellent way to monetize your blog while showcasing your expertise.
Consider developing e-books, online courses, templates, or exclusive content that caters to your audience’s needs. Promote your products through dedicated sales pages, email marketing campaigns, and strategic calls-to-action within your blog posts.
Deliver exceptional value and establish yourself as a trusted authority to drive sales.
5. Offer Services
In addition to creating and selling digital products, offering services can be a profitable way to monetize your blog.
By leveraging your expertise and skills, you can provide valuable services to your audience while generating income.
6. Sell Courses
We’ve earlier talked about digital products which include courses.
But since digital courses are often highly valued and cost more bucks when compared to other digital products, it’s worth dedicating a section to.
Selling digital courses is an excellent way to monetize your blog while sharing your knowledge and expertise with your audience.
With the growing demand for online education, creating and selling courses has become a popular and profitable avenue for bloggers.
7. Sponsored Reviews and Collaborations
Sponsored reviews and collaborations provide an opportunity to earn income while showcasing products or services relevant to your audience.
Brands may approach you to review their offerings or collaborate on projects. Ensure transparency by clearly stating when a post is sponsored, and maintain your authenticity by providing honest and unbiased opinions.
Engage with your audience and encourage them to share their thoughts and experiences.
8. Ad Space Rental
If your blog has gained significant traffic and visibility, you can monetize it by renting ad space to other businesses or bloggers.
Reach out to relevant advertisers or use ad networks to connect with potential clients.
Ensure that the ads displayed align with your blog’s niche and maintain a high standard of quality. Monitor and optimize ad performance to maximize revenue.
Properly monetizing your blog is an exciting process that allows you to turn your blogging hustle into a profitable venture.
By implementing these 8 best ways to monetize your blog or a combination of any, you can easily generate income while providing value to your audience.
STEP 13:
Maintain Blogging Consistency
Embarking on the exciting journey of starting a blog is just the first step.
As a newbie or beginner blogger, one of the most crucial aspects of ensuring sustained success is maintaining blogging consistency.
In this section, we’ll explore the significance of consistent blogging, the challenges beginners might face, and practical strategies to stay on track.

Blogging consistency is not just a good practice; it’s the heartbeat of a successful blog.
Consistency builds trust with your audience and improves search engine rankings.
Let’s delve into practical strategies to help you maintain a consistent blogging schedule, build a reliable routine, and overcome common challenges.
1. Content Calendar
A content calendar is your blogging roadmap, providing a clear plan for upcoming posts.
Benefits of Using Content Calendar:
- Organization: Helps organize and plan content in advance.
- Consistency: Ensures a steady flow of content.
- Variety: Allows for diverse content types and themes.
Implementation Tips:
- Monthly Overview: Plan your content for the month ahead.
- Flexibility: Leave room for timely or spontaneous posts.
- Brainstorming Sessions: Dedicate time to brainstorm future content ideas.
2. Batch Writing
Batch writing involves creating multiple blog posts in a single session.
Benefits of Batch Writing:
- Time Efficiency: Maximizes your writing productivity.
- Consistent Output: Provides a reserve of content for busy periods.
- Cohesiveness: Maintains a consistent writing style across posts.
Implementation Tips:
- Designated Time Blocks: Allocate specific time blocks for writing sessions.
- Content Themes: Batch write posts with similar themes or topics.
- Editing Separately: Edit and refine posts in a separate session for quality assurance.
3. Theme Days or Series
Introduce themed days or series for a regular and predictable content schedule.
Benefits of Theme Days/Series:
- Anticipation: Creates anticipation among your audience.
- Structural Consistency: Helps structure your content calendar.
- Brand Identity: Establishes a consistent theme associated with your brand.
Implementation Tips:
- Select Themes: Choose themes or topics that align with your niche.
- Consistent Schedule: Stick to a consistent schedule for theme days or series.
- Interactive Elements: Encourage audience engagement through comments or social media.
4. Set Realistic Goals
Establish achievable posting frequencies based on your available time and resources.
Benefits:
- Reduced Stress: Minimizes the pressure to meet unrealistic goals.
- Quality Focus: Allows for a focus on maintaining content quality.
- Sustainable Growth: Sets the foundation for long-term consistency.
Implementation Tips:
- Evaluate Commitments: Consider your other commitments and set realistic goals.
- Start Small: Begin with a manageable posting frequency and adjust as needed.
- Consistency Over Quantity: Prioritize a consistent schedule over a high volume of posts.
5. Utilize Scheduling Tools
Scheduling tools enable you to plan and schedule posts in advance.
Benefits:
- Consistency: Ensures posts are published at regular intervals.
- Time Management: Allows you to plan posts during your most productive times.
- Flexibility: Accommodates variations in your daily routine.
Implementation Tips:
- Explore Options: Find a scheduling tool that aligns with your blogging platform.
- Batch Scheduling: Schedule multiple posts at once for efficiency.
- Monitoring Engagement: Use analytics to determine optimal posting times.
Consistent blogging is a journey, and these practical strategies are your roadmap to success.
Remember, consistency is a marathon, not a sprint. Always stay committed and inspired to your blogging journey.
Myths That Might Stop You From Starting a Blog
Myth 1: Starting a blog is expensive
No, it’s not. I’ll show you how to host your blog for only $2.99/month. If you can skip just 1 cup of coffee from Starbucks a month, then you’re good to go.
Myth 2: You need super-strong writing skills to make it as a blogger
Not true.
People visit blogs for advice and simple solutions to their problems.
It’s important to know that majority of your audience will be average readers like you and me looking for simple advice and not graduates of Ph.D. in English Literature.
So instead of looking for fancy words to cramp in, it will offer more value if the writing is realistic, honest, and simple.
Myth 3: You need to be a computer wizard to start a blog.
Also false.
With recent developments in technology, you don’t need any technical knowledge whatsoever to start and run a blog from scratch.

As far as you can navigate your way to this website and access this guide with your phone or laptop, you will do just fine.
Process Summary (Starting a Blog)
A complete recap of what we’ve been able to achieve through this guide.
- You’ve determined your blogging niche ✔
- Crafted a name for your blog ✔
- Hosted your blog with Bluehost ✔
- Gotten a responsive blog theme (DIVI theme ) ✔
- Have a sound idea of blog setup and design ✔
- Know how to set up “About Me” and legal pages ✔
- Conversant with the useful WordPress plugin ✔
- Have an idea Google Search Console & Google Analytics ✔
- Learnt how to create awesome content & Installed Grammarly ✔
- Gotten a free copy of my On-Page SEO Checklist ✔
- Have an idea of aggressive content promotion ✔
- Sound knowledge of blog monetization ✔
- Sound knowledge of blogging consistency strategies ✔
..Pheww, right on track; I think you deserve a toast, me too☺️
Yet to grab a copy of my On-Page SEO checklist?
Here is another chance.

…And it’s a wrap
I put a ton of effort creating this blogging guide and I do hope it was helpful.
NOW OVER TO YOU
What was your major challenge starting your blog?
Have you properly followed all steps as documented in this guide?
Share you thoughts and feedbacks with me in the comment section below.
If you love this guide, please share it with your friends and colleagues via the share icons, let’s all win together this year.
Till we meet again on another article, happy blogging.

Can I just say what a aid to search out somebody who actually is aware of what theyre talking about on the internet. You undoubtedly know tips on how to deliver a problem to light and make it important. Extra folks have to learn this and understand this facet of the story. I cant believe youre no more well-liked because you definitely have the gift.
I appreciate your kind words Gralion , Thanks.